Travel photography podcast with Ralph Velasco
Travel photography can be a tricky thing. In a world of infinite images and photography possibilities, how do you take better photos, and how do you manage them all? We speak with photography instructor Ralph Velasco about how to improve your travel photography.
To listen, hit play below or find episode 200 in iTunes, Stitcher or Soundcloud:
To see more travel photography advice and stories, visit our travel photography page.
The 3-5 second rule
Don’t pray and spray: take an extra three to five seconds to compose your shots. See if you can remove any excess “stuff” from your framing, and micro-compose the scene to get the strongest possible image. You’ll take less pictures, but you’ll have more “keepers”.
No one wants to spend a long time doing post-production while they are travelling. You want to spend time out exploring your destinations, not stuck in a hostel common room with your laptop.

Research shots at your destination
Take time to research your destination before you go. But don’t just look at your travel planning, look at what photos can be taken there. This is especially true if you have limited time in each place.
Look at stock sites like Corbus Images, Getty Images or Flickr for inspiration, and pre-visualise your own shots.

Use a shot list
Everyone has their own favourite styles of shots to take … landscapes, portraits, street scenes. But that means a majority of your photos are going to look similar or have similar styles. By having a shot list — a list of photo styles you want to capture — you are likely to come home with a well-rounded portfolio of photographs.
Ralph has created an iOS app to help you plan and track your shot lists.

Taking candid people photos
The ethics around taking someone’s photo, especially if you plan to publish it somewhere (from your personal Facebook page to professional usage), is tricky. If you ask someone if you can take their photo, you’re likely to get forced, posed photos … no good! A “shoot first, ask questions later” approach to photography means you’re likely to get candid, natural photos of people to use.
(Editor’s note: there’s a good discussion around the ethics of taking people’s photos in Transcending Travel Photography.)

Use RAW if you can
Shooting in JPG, no matter how high quality, “bakes in” certain parts of the image — things to do with colours, sharpness and light balance. If you shoot in the RAW file format, you’ll have more opportunities to correct or enhance your photos in post-production. RAW is available on most DSLR cameras, but only some point-and-clicks.
RAW files are much bigger than JPGs, but all professional photographers and many enthusiastic amateurs use this format. If you don’t have the skills to do post-production now, it might still be worthwhile, since later on — after you learn to use Lightroom, Aperture or Photoshop — you’ll be able to go back and make improvements.

About Ralph Velasco
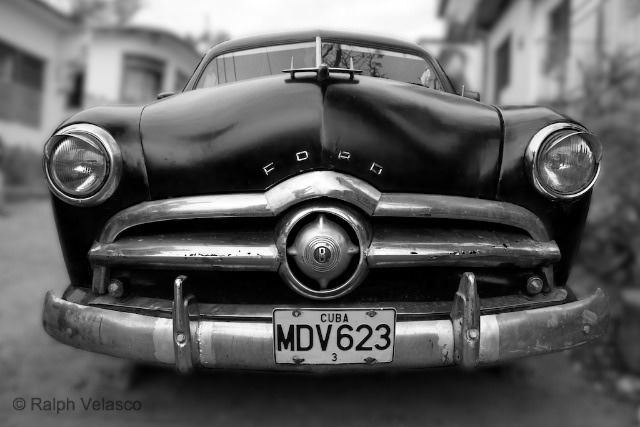
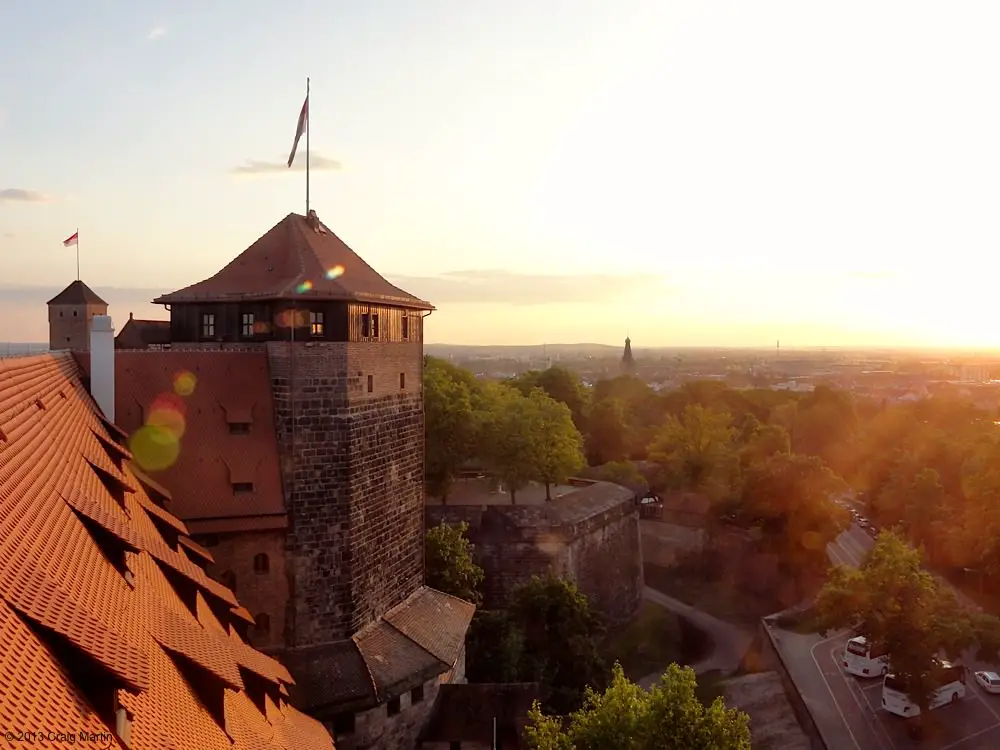
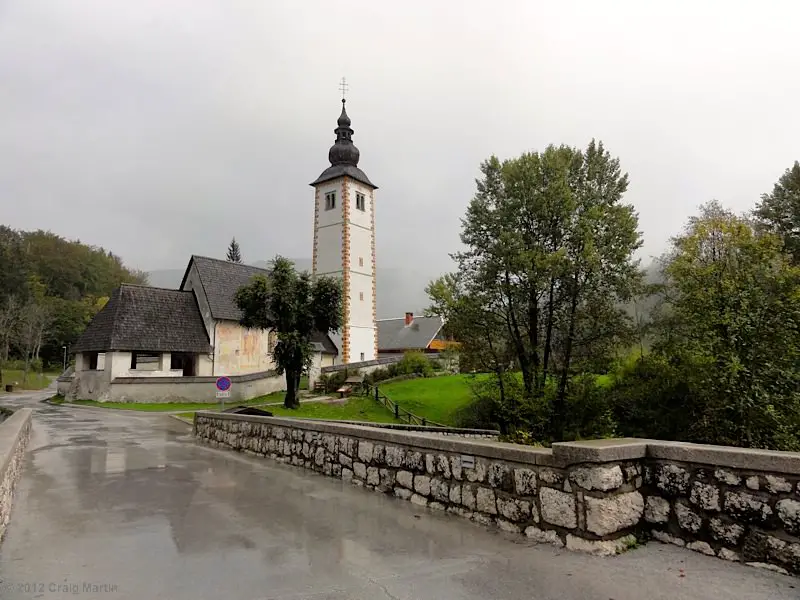
Our interviewee, Ralph Velasco, is a travel photography instructor based out of California, USA. He is the author of On Travel Photography: 101 tips for developing your photographic eye and more and created the iOS app, My Shot Lists for Travel. Ralph supplied all the photos in these shownotes and in the enhanced version of the podcast.
To listen, hit play above or check in iTunes, Stitcher or Soundcloud.
Really helpful tips! I’m currently on a year long, round-the-world trip and started off SO excited for travel photography. I still am, but have discovered I just don’t have the time and energy for it like I originally planned. It’s so difficult to juggle blogging, photography, and still actually go out and see sights (in the midst of researching destinations as I go). I’d love to be able to research shots and use a shot list… but now I’m too tired in the mornings to get up for golden hour anymore. I admire anyone who’s able to put these travel photography tips to use while on extended long-term travel. Maybe I’ll find that balance one day 🙂
Hi Adrienne, we know that feeling! It can be hard to balance your travels when you’re also wanting to blog or run a business! When you slow down and recharge, maybe you’ll find that energy again?
We often find we get tired when moving quickly around the place, so try and work in stops in places for a fortnight or longer. Next jaunt, we’re planning some one month or longer stops already … No idea what we’re doing in the meantime, but we have the stops in place!
That’s very true. The pace we’re going at isn’t TOO fast…but we could definitely go slower. We’re trying to see as much as we can in one year while keeping up with the blog and business. Gotta remember though that those cities we want to visit will still be around during our lifetime. Although choosing what to cut out is so difficult =/. One month or longer stops do sound like a tempting workable pace. Happy travels on your next jaunt! 🙂
Indeed! Since you’re working as you travel, is there any reason you don’t just add another year onto your trip and slow down?
It’s definitely too hard to cut things out 🙂
Because we left a dog behind (got him before we decided to start traveling) and miss him terribly. Family is currently taking care of him, but we’re thinking of moving to Taiwan after our RTW trip to learn/improve our Chinese and bring our dog with us. Also, parents and grandparents keep bugging us to have a baby haha.
That’s dangerous talk, that family+baby talk! We get it every time we’re back in New Zealand 🙂 Good luck with finding that balance for the rest of your trip!
Really Nice I have No Words About That
Hi Adrienne,
Thanks for your comments on the podcast. I know it can be difficult to get up during the golden hour each day, but there’s nothing that says you can’t get up early and then take a nap in the middle of the day – when the light is typically at its worst – to make up for the lost sleep. I’ll often do this and not feel a bit guilty.
There are so many advantages to getting out early, just some of which are: better light, less tourists, cooler weather, greater opportunity for chance encounters with the locals, and although I’ve never seen any statistics, I would imagine that the crime rate in most cities is very low early in the morning!
Safe travels, Ralph
Ralph, you make excellent, convincing points. I’m in Hong Kong right now fighting heat, humidity, and rain…but will be in Europe soon. Come Barcelona, I will get up at those loathsome hours to avoid the crowds, harsh sun, and greet that golden light. Good point about less crime at that hour too. I’d believe it. This should improve our travels in Europe during peak season too. Thanks for the inspiration 🙂
I got some of my best pictures at 5-6am from 3rd floor of hotel in HCMC (Saigon). Camera on tripod, the early morning activities of the Vietnamese riding motor bikes, bicycles to their place of business. The variety and excitement of these amazing people going to work with their merchandise. If you’ve been their, then you know what they are able to carry on a motor bike or bicycle. I’m planning a 6 month journey/video/photograpy trip this fall. India, Egypt & Asia are on the map.
That sounds awesome, Chuck. I hope you’ll share some photos on the Indie Travel Podcast Community as you go.
Congrats!… on your 200th podcast, Happy Birthday and thank you for the tips about taking photos…
it’s so frustrating to see something so beautiful to then take a shot of it and for the picture to turn out mediocre, these tips will help that problem we have, not to mention it will get us up early for one of our favourite things while sipping on our morning coffee- watching the sun rise! 🙂
Nancy and Shawn
Thanks Nancy and Shawn! We can’t believe we’ve made it so far … enjoy those morning coffees, and make sure you share some of the shots with us 🙂
Nancy and Shawn, glad you enjoyed the tips. If you’ll put them into practice I can almost guarantee you’ll see your photography go to another level, even if just incrementally. I need to come up with an invention that allows you to shoot AND have your coffee with you! All the best, Ralph
WOW just what I was looking for. Came here by searching for travel photography
Hi, glad to hear that! We’re happy to help you out… Looking forward to seeing some of your own travel photos one day.