How to make passport photos online
In preparation for our trip to Italy, my best friend and I have realized that we have to do something about our passports. In her case, she needs to acquire one, and in my case I need to get mine renewed. For both of us, this means passport photos.
She elected to have hers taken when she went to the passport agent (the post office) which charged her $15 for three photos. I chose to take a less well-known route, and paid $0.30 (including tax) for five photos; a saving of $14.70.
Want to learn my secret? Read on!
Step 1: Take a photo
Start with a blank, white wall and another person. Hand the other person your digital camera or — if your cell phone has a five megapixel or higher camera — your cell phone. Make sure you are well lit. Make sure you are wearing clothes that you might choose be happy to exit your house in. Make sure to look like you are bored out of your mind (the passport agency calls this a “neutral expression”). Make sure that your hair is “down” rather than in a bun or tied back. And make sure that you take photos without your glasses on even if you are likely to be wearing them while travelling. Then get your friend to take ten or so photos of you, straight on. I’m sure that in amongst those ten, you are likely to find one where you are at your least attractive and most rough-looking. That is the one you want.
Step 2: Head to the website
Head over to ePassportPhoto.
From there, you will see a lot of different options for different types of passport photos. If you want photos for a US passport, just go ahead and click “Get my passport photo.” Otherwise, choose the option that suits you; this site can produce photos that fit the requirements of many types of visas as well as for passports from other countries. You pay nothing for using the site.
Step 3: Upload your photo
The next page you will go to will ask you to upload your photo. Click on “Browse…” and find the photo you want to upload. Make sure you look the least happy and the most disheveled, as this will likely match how you will appear to the immigration agent — I can speak from personal experience, having had trouble entering some countries when my photo looked too cheerful and chipper compared to my jet-lagged sleep-deprived face.
Once you have selected your photo (1), then click on, “Next >” (2) to advance the process.
Step 4: Wait
Now, you wait while your photo is being uploaded. Until, finally, as if by magic, your photo will appear.
Step 5: The tough part
This step is difficult and takes some trial and error until you manage to get it correct. You will need to click, hold and drag to make a box that will fit your head such that the top of your head and bottom of your chin are somewhere in each of the green zones. It does not actually need to be on your face, though.
Usually, it takes me four or five tries to get this to work, and I’ve done photos for myself and several of my former students.
Step 6: Move the box onto your face
Click, hold and drag in the middle of the box and position it onto your face. You will get very good at doing this, unless you managed to luck out and make the correct sized box to begin with.
After that, click, “Next >” to advance the process.
Step 7: Avoid the upsell
“No thanks” is your friend.
Step 8: Receive your photos
Click the indicated link to download an all-in-one photo sheet that will look something like this:
Step 9: Print it, somewhere
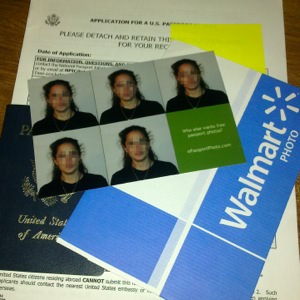
I chose to print my photo at WalMart because I was there anyway as a social outing with a friend. Walmart charges $0.28 for a 4″x6″ photo (which is how large you should print it) which became $0.30 once tax was taken into account.
A 4″x6″ photo from ePassportPhoto will produce five passport photos that are the correct size for your passport.
Step 10: Cut
Grab a pair of scissors and slice off the two photos you are required to submit in your application.
Step 11: Staple
Stack your photos one on top of the other, and grab your household stapler. Now drop four staples into your photo stack to get them to adhere to the page.
And with that, you have saved yourself $14.70 on passport photos, and still have three that you can use for such fun things as applying for visas to Japan so that you can help out with the tsunami and earthquake cleanup.
All photos courtesy of the author.

I did this!
since I seem to enjoy making things more complicated for myself, I used an online tutorial and photoshop to get the proportions and size right and a tripod and the camera’s timer to take the photos myself. (this provided the additional fun of rushing from the camera to the chair.) I also made my own light stands with pvc pipe since my house is poorly lit.
it seems there are conflicting instructions about the two photos–some sources say to stack and staple them both, but the official site (this would be for the USA) says to staple one photo and enclose the other. reference: http://travel.state.gov/passport/get/first/first_4426.html
I stacked and stapled and had absolutely no trouble with the US Passport Agency. I also accompanied the best friend when she went to get hers done for the first time and the passport agent at the post office also stacked and stapled.
This is a very useful tip I’m goin to try this one of these days
I must express my appreciation for your kind-heartedness giving support to people who actually need help on this particular niche. Your personal dedication to getting the solution along was definitely beneficial and has constantly encouraged associates just like me to arrive at their desired goals. Your entire useful guide signifies a great deal a person like me and much more to my mates. With thanks; from everyone of us.
I went to get passport photos done at Walmart for my passport/visa/green card and ended up with mugshots/terrible photos. I was so bummed with my pictures that I searched the web for a service that would let me take them myself and found http://www.passportica.com. They were easy to use, not expensive, and they shipped the photos to me in 2 days – so I didn’t have to make another trip. recommended.
I found great service and more cheap than this.
http://www.onlinepassportphoto.com/
I got perfect passport pictures very quickly. And in very simple steps.
Great service!
Really helpful for someone like me, who has been struggling to do it online. Thanks Jennifer.
Thanks for your comment! We’ve saved lots of money using this strategy.
I recommend http://ipassportphotos.com/ as I have used it several times for getting my passport and visa pictures. I just love their quick service. I’ve always got by photos within few hours after placing order. Highly recommend.
Thanks for the tip! I like services where I can save the file and print it myself, because I often need passport photos when I’m somewhere delivery won’t reach me easily. Last time I used one of these online passport photo services, I was in Colombia 🙂